I printed all the parts I needed for my 2.4 build on my Monoprice Maker Select Plus (a rebranded Wanhao Duplicator i3 Plus), enclosed under a couple of cardboard boxes taped together. The parts were… functional, but not exactly pretty.
Motive for reprinting:
- My z-homing isn’t that consistent and I need to fiddle with live z a bit for each print. My StealtBurner didn’t fit together that well, so I’m hoping that better fitting parts will result in more consistent homing
- Moving to a Bondtech BMG Integrated Drive Gear Assembly in hopes of having fewer z-artifacts. If I’m going to rebuild my CW2, I might as well print it again too
While disassembling, I noticed that one of the bolts attaching the carriage to the linear rail was… very very lose (backed out 3+ turns). Maybe that was another contributor to my inconsistent homing.
More photos:
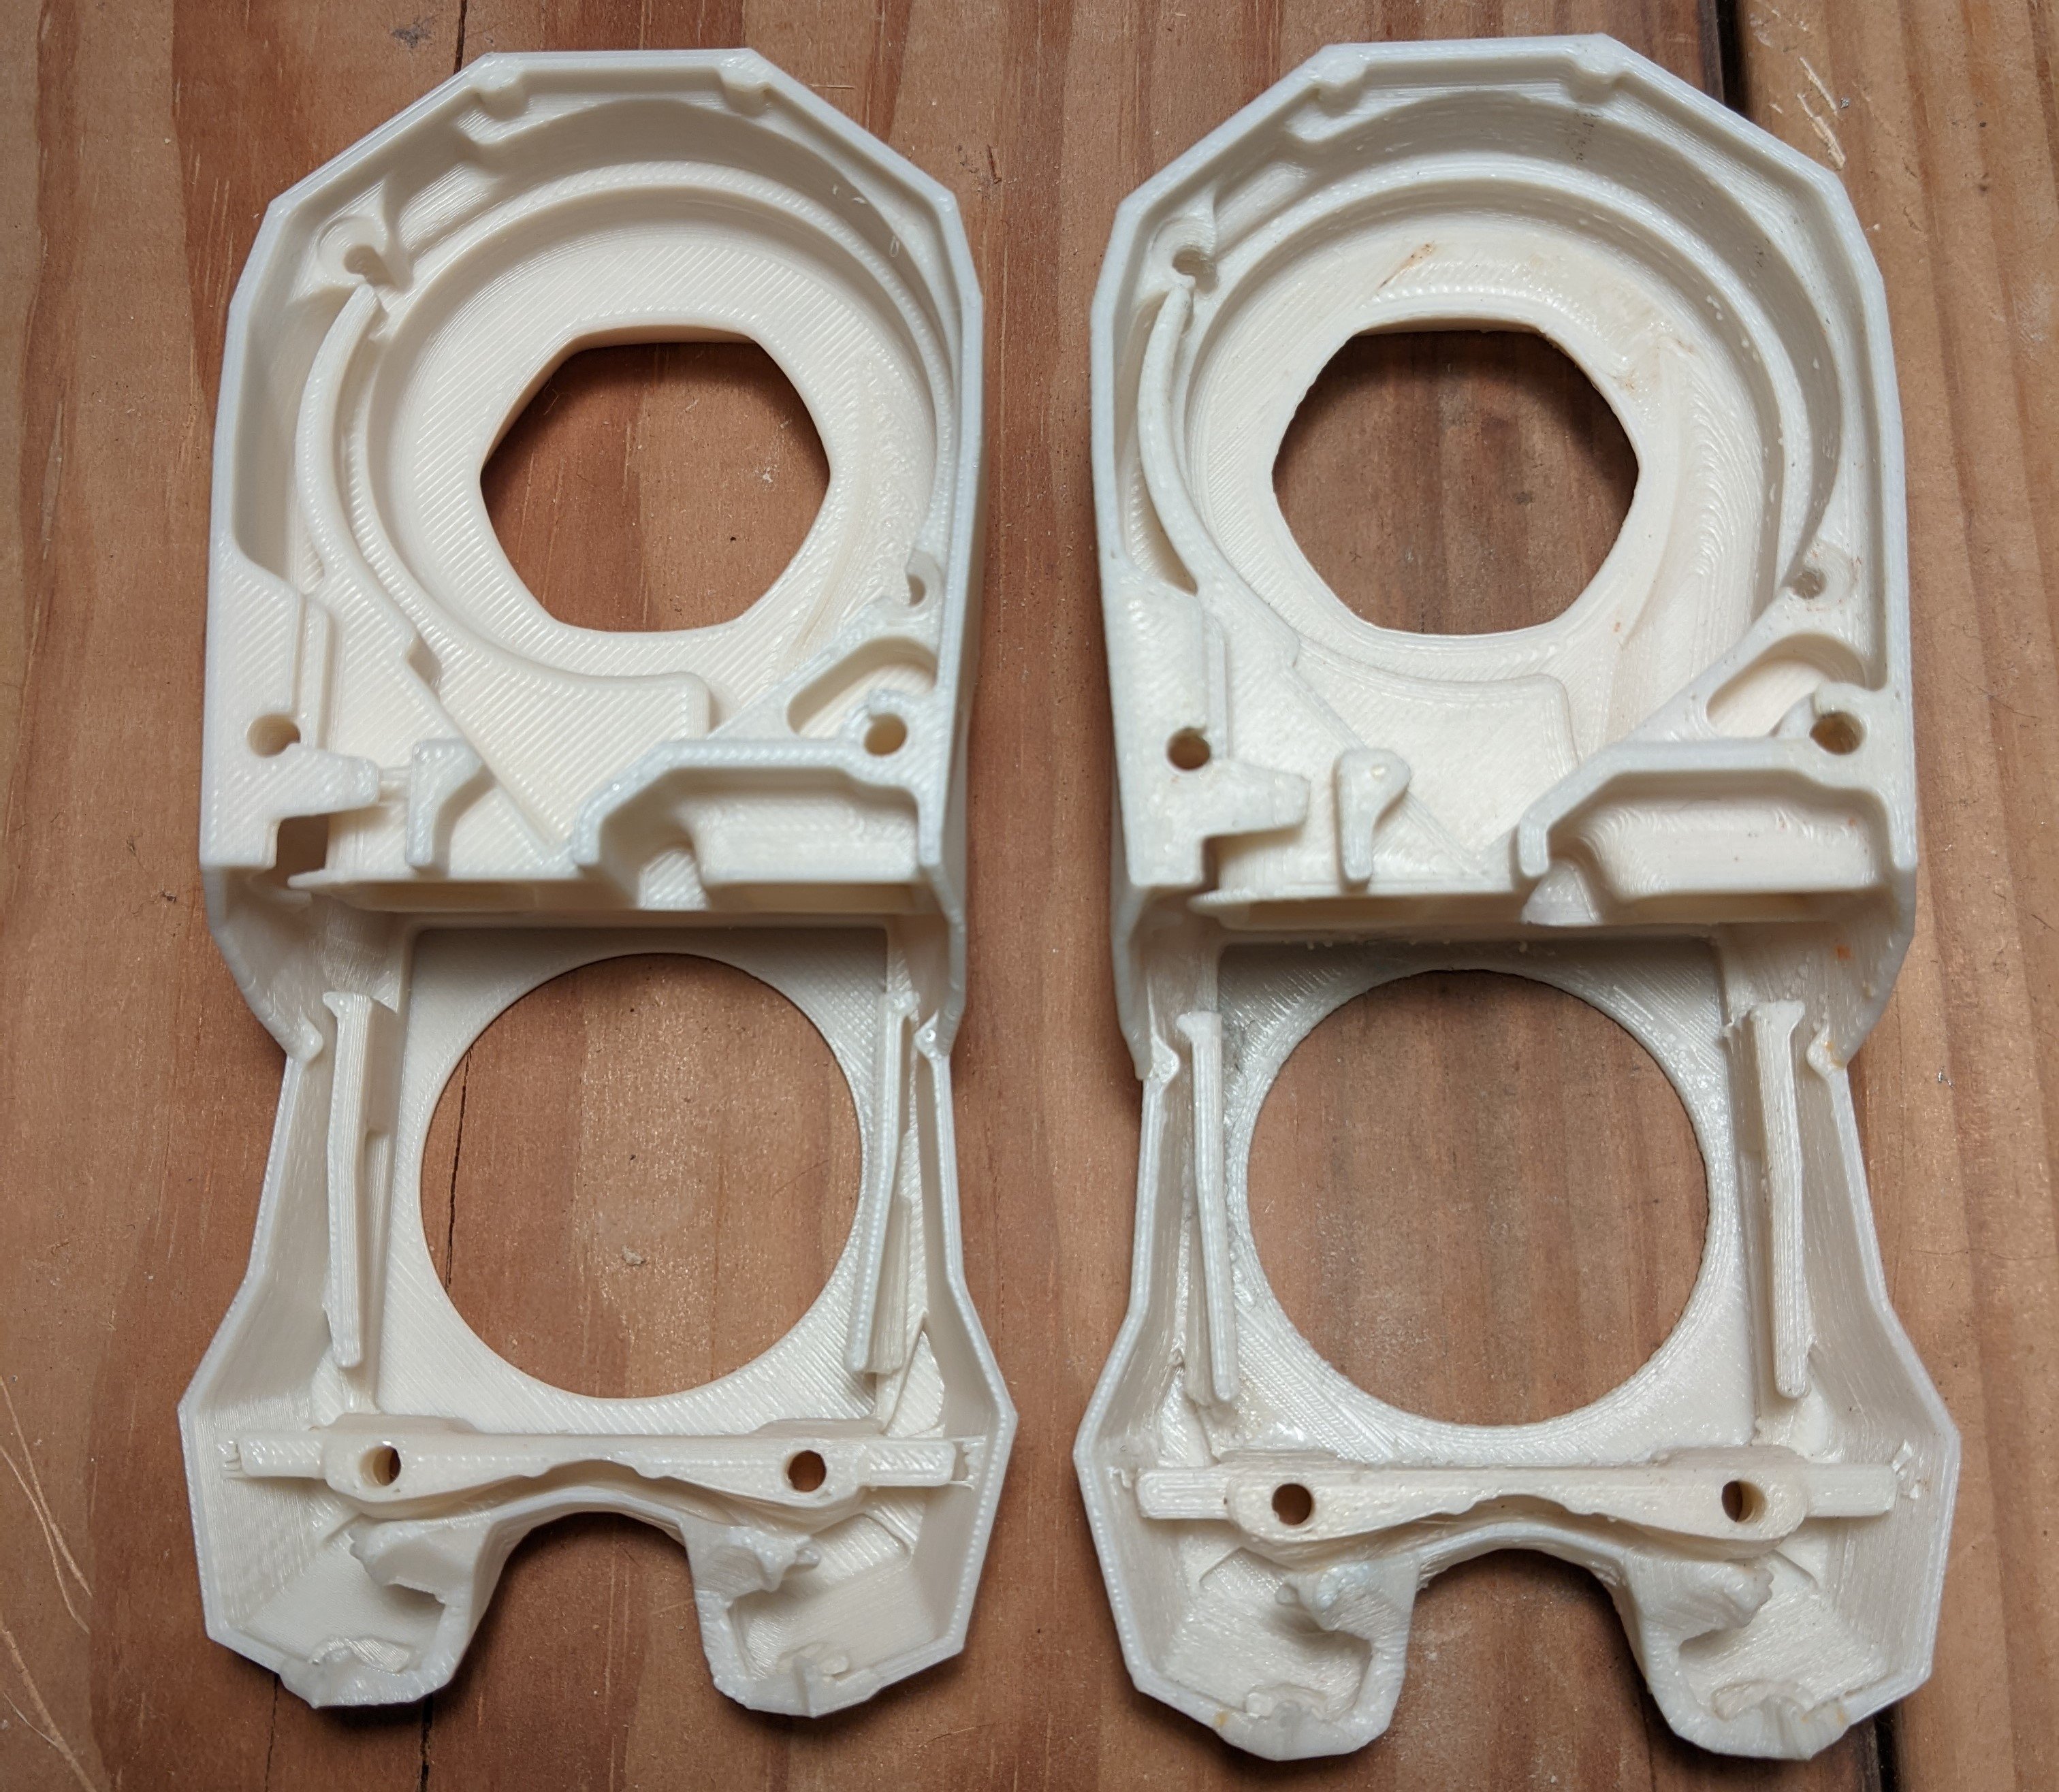
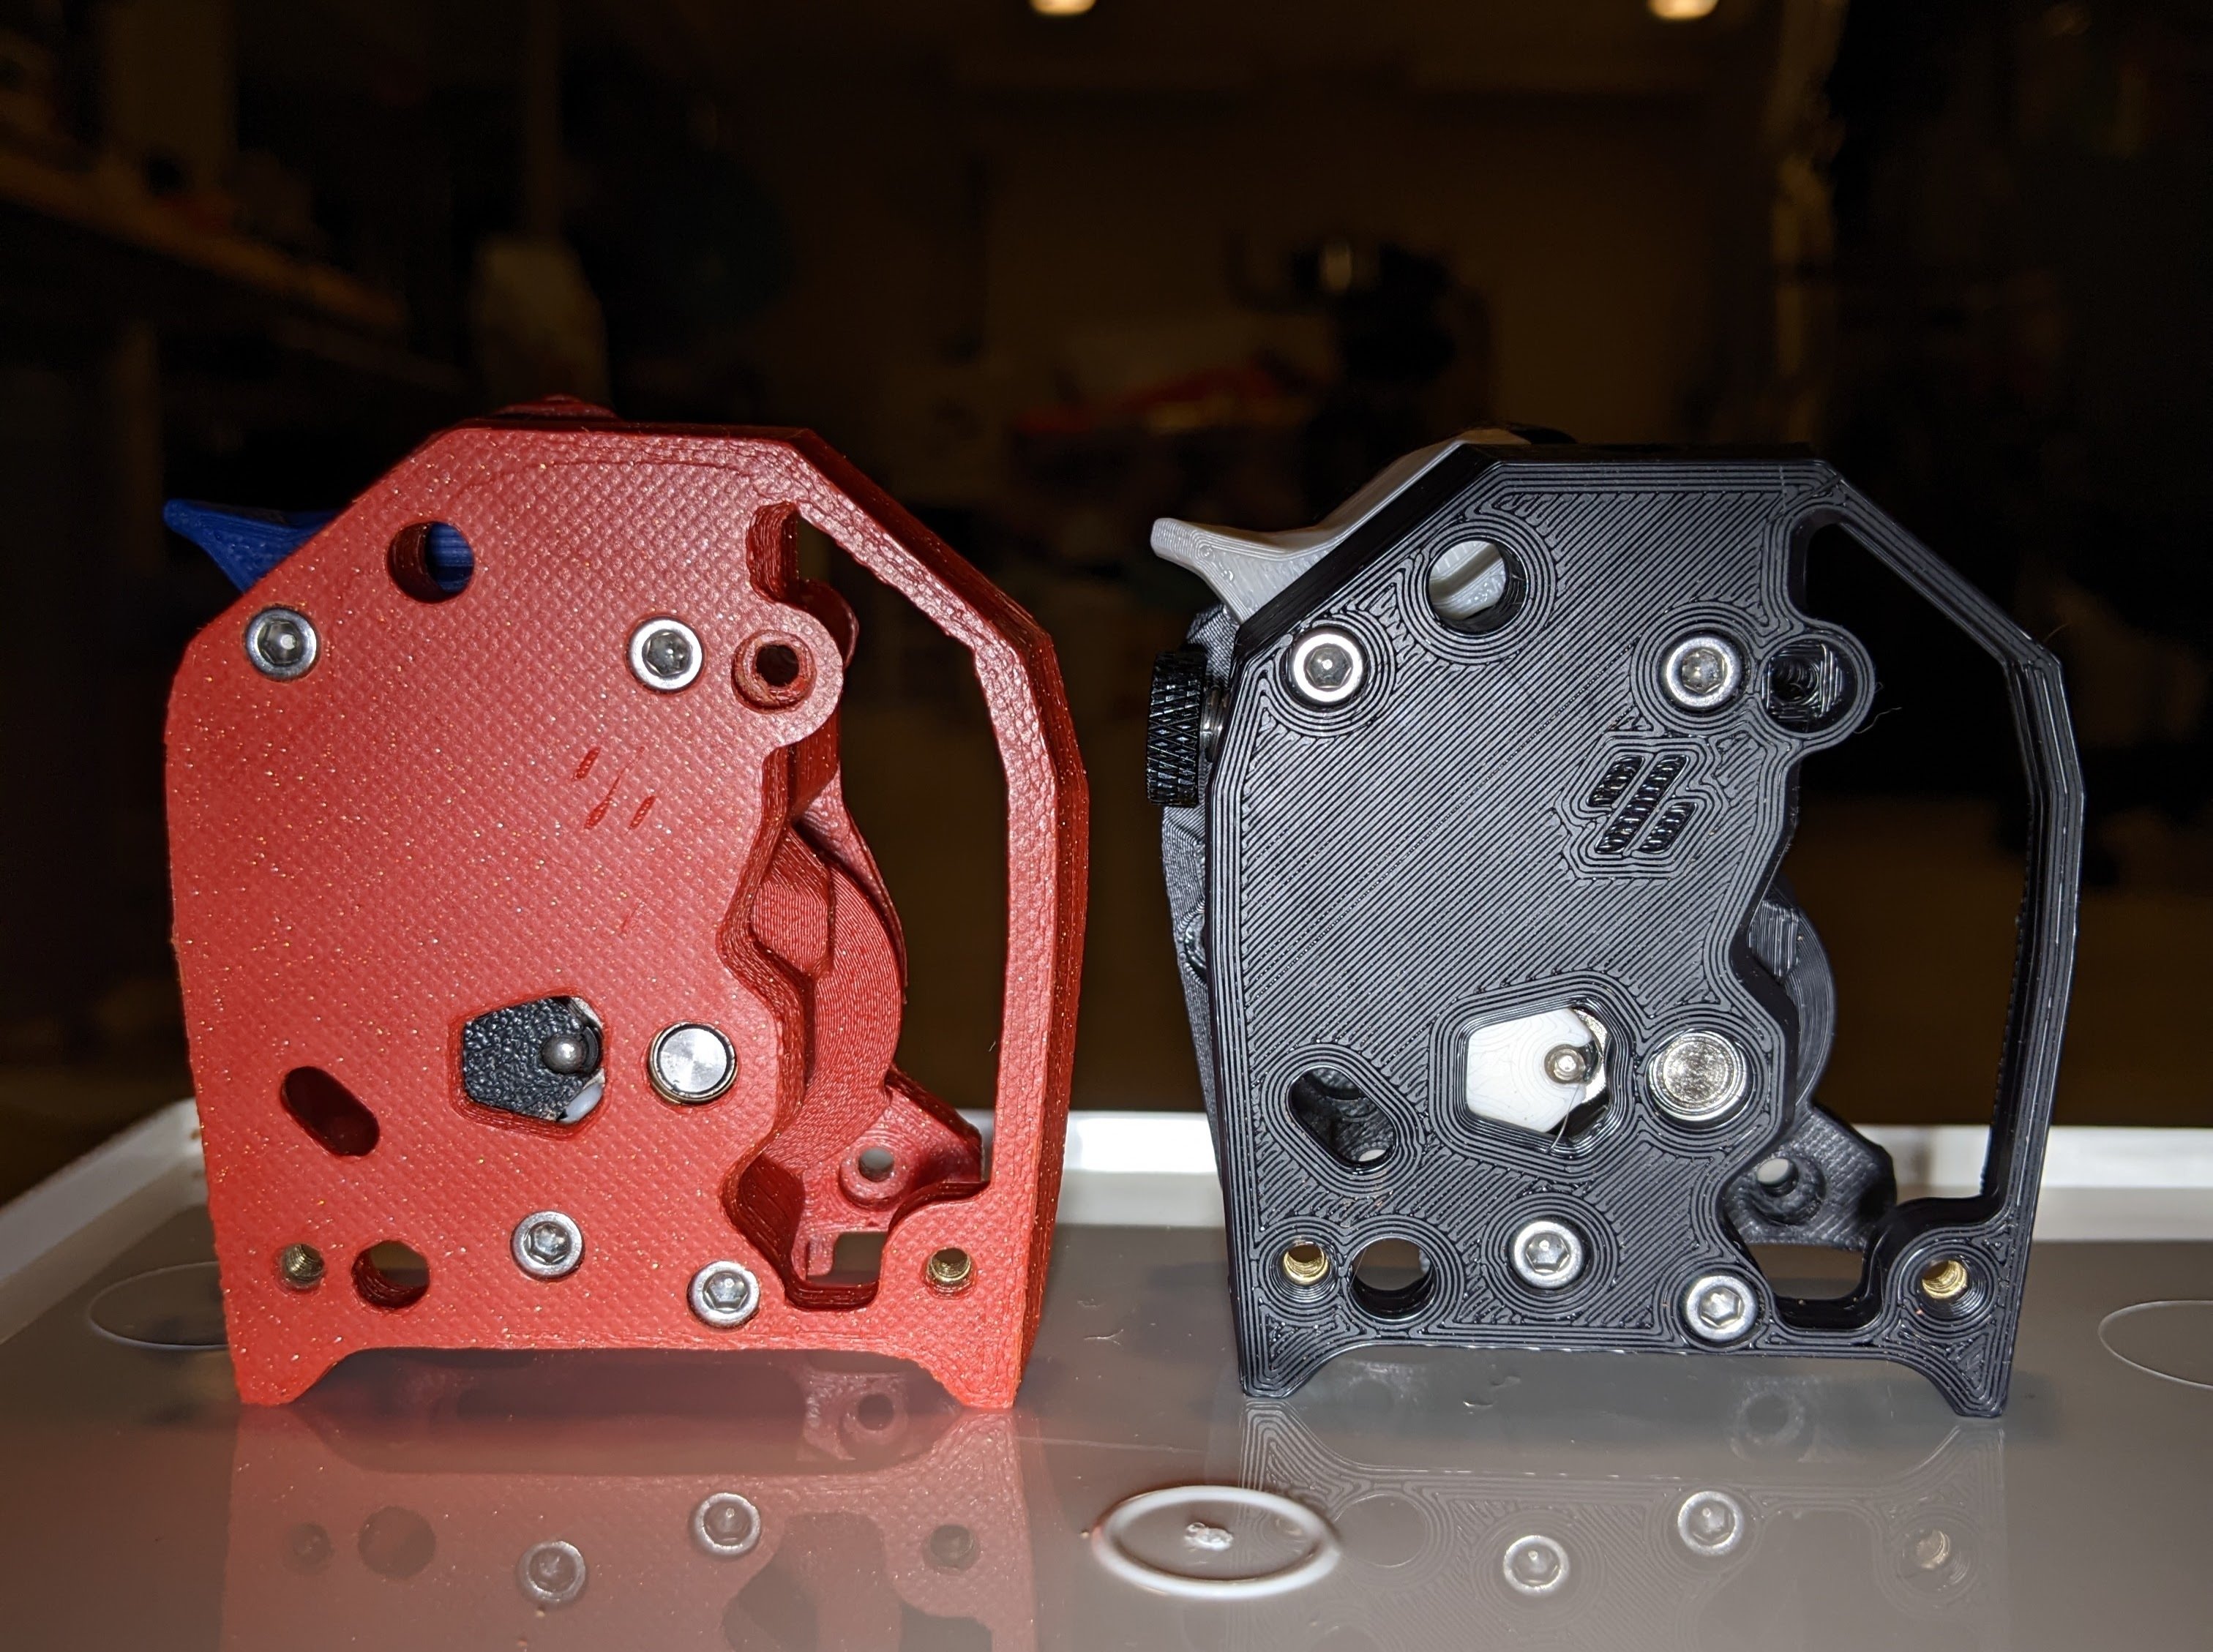
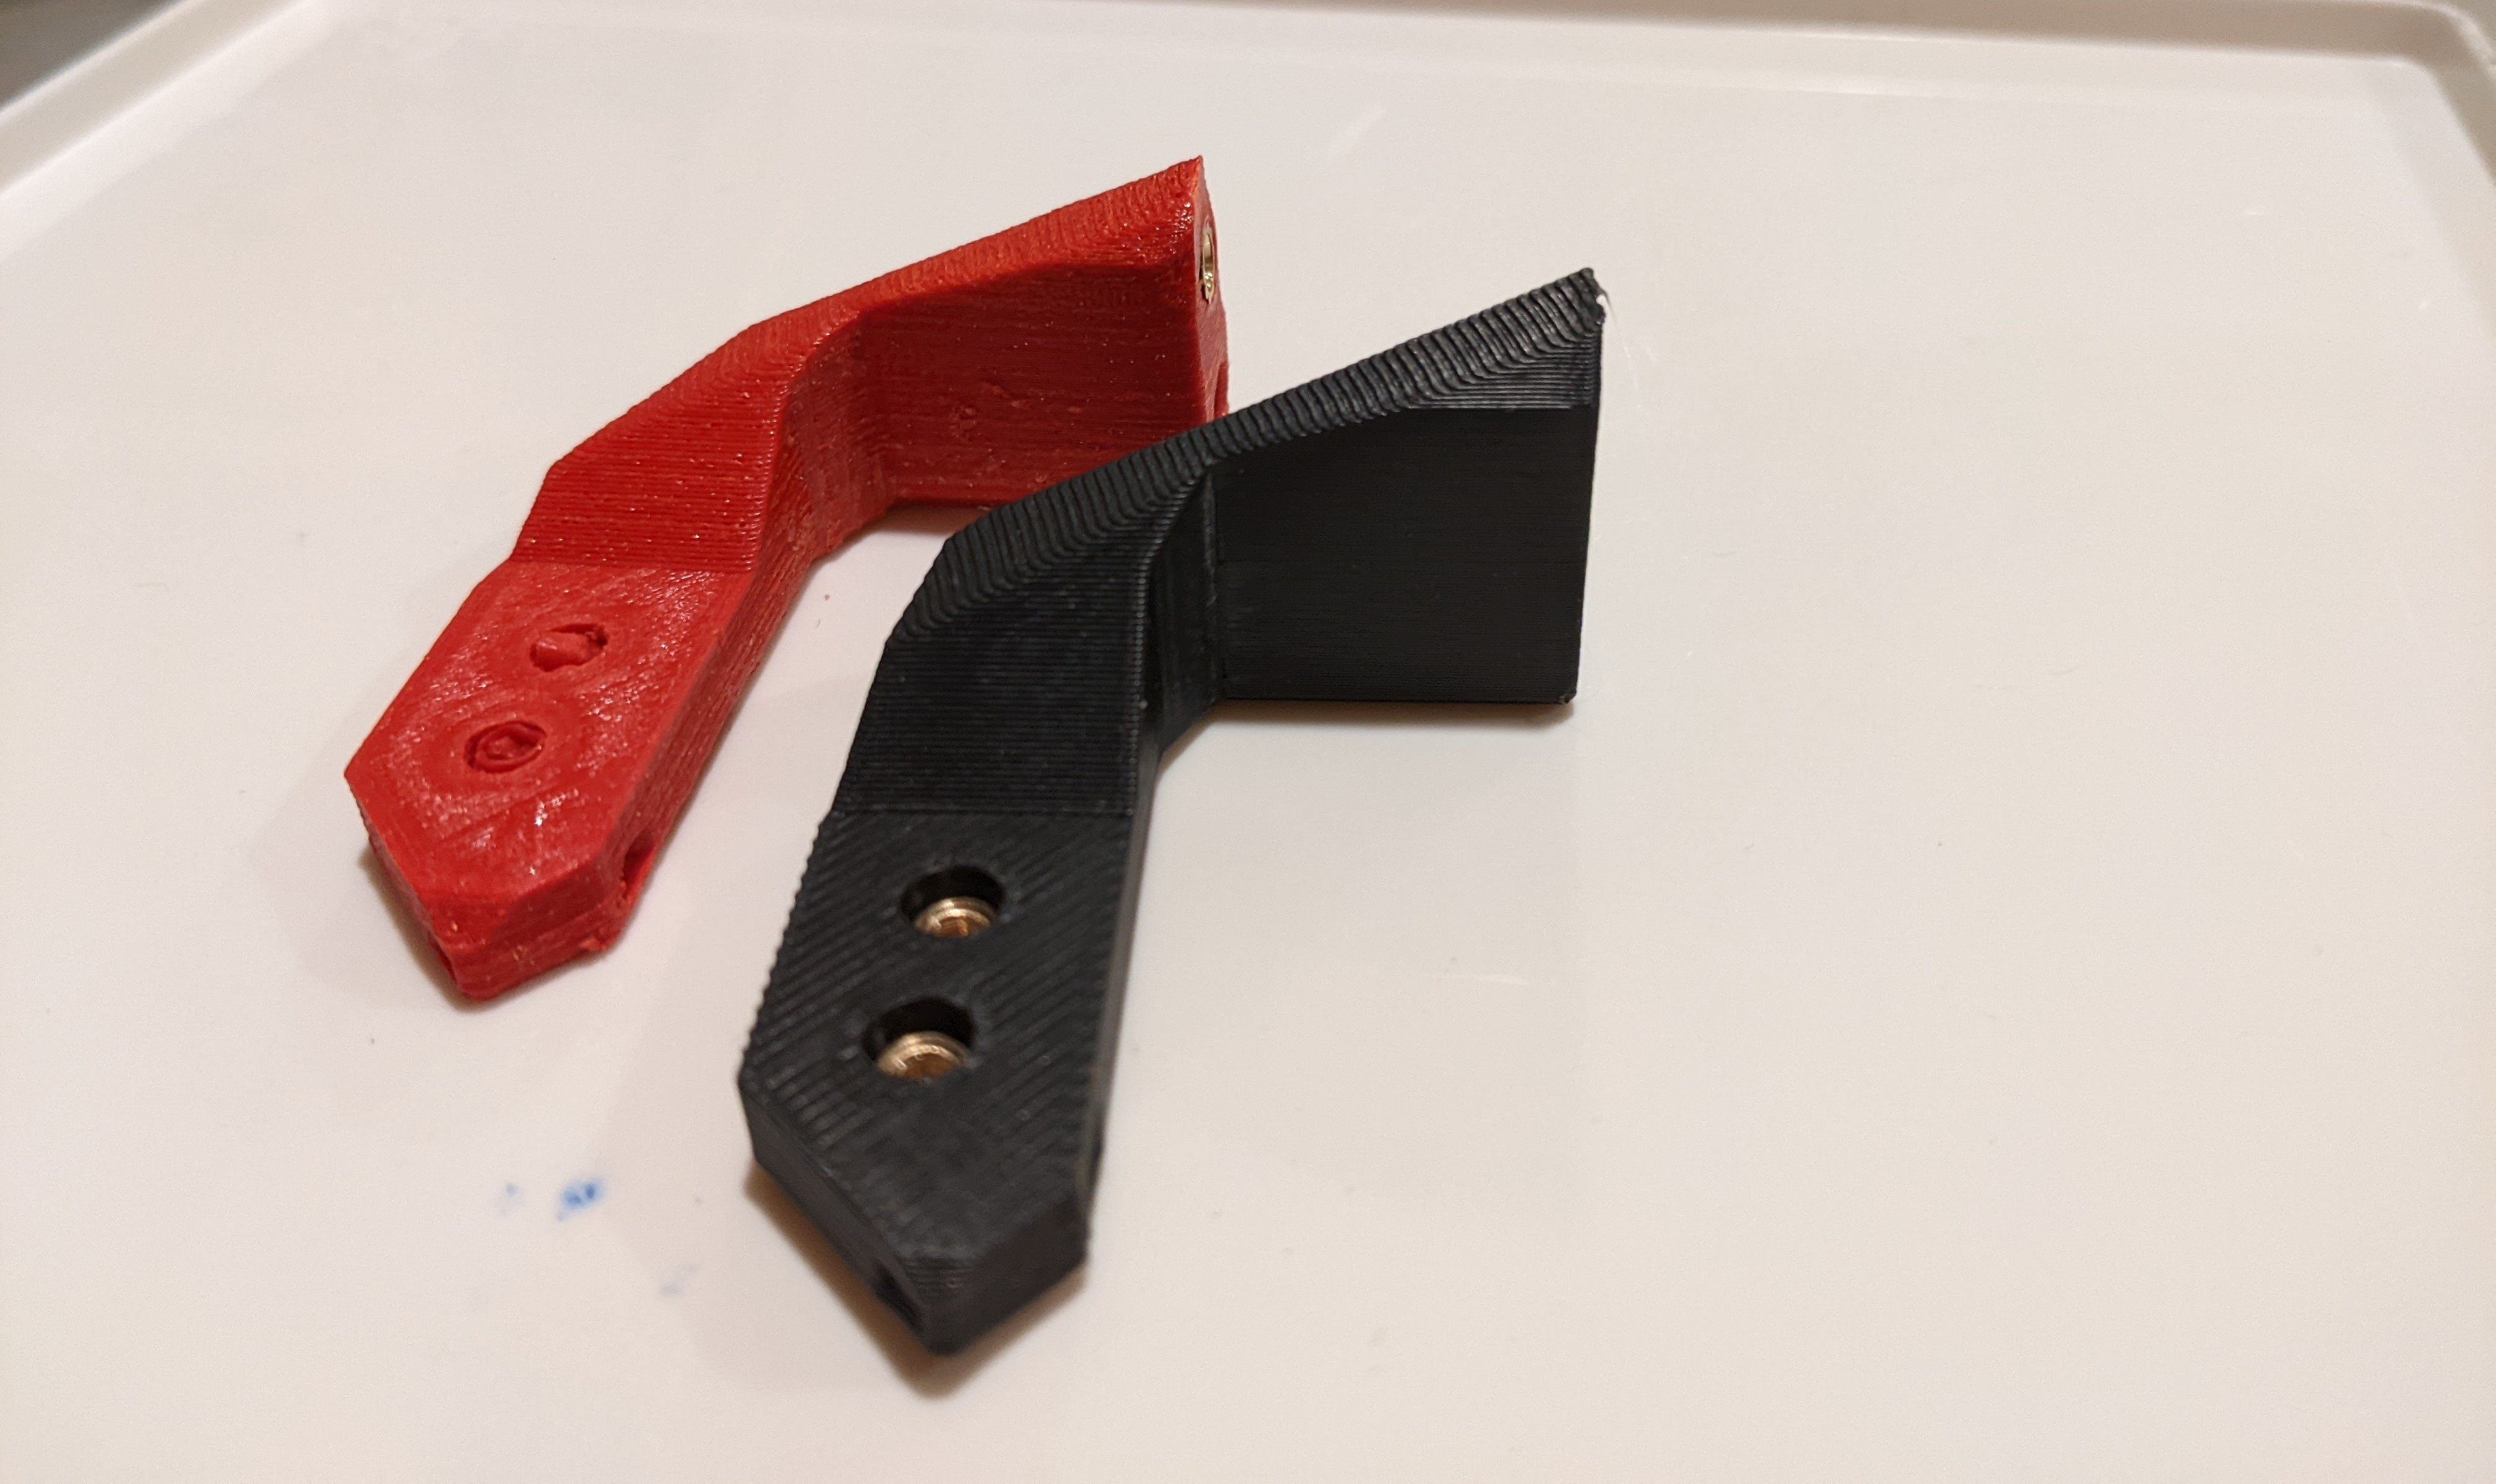
My first print with the rebuild is underway! I’m very excited to see if there’s any change to the random z-artifacts I was seeing before, but I’m sad to report that my first klicky attach probe failed.
Fantastic results! Looking forward to hearing if the integrated BMG drive gear assembly noticeably improves your prints. I have one in a box I’ve been putting off installing.
Early results: it’s an improvement, but z-artifacts are not gone. I’ll have to try a hollow cylinder to see if there’s a pattern there. I also have a machined POM gear in the mail, complete with helical drive gears. I’ll be sure to post results with that as well.
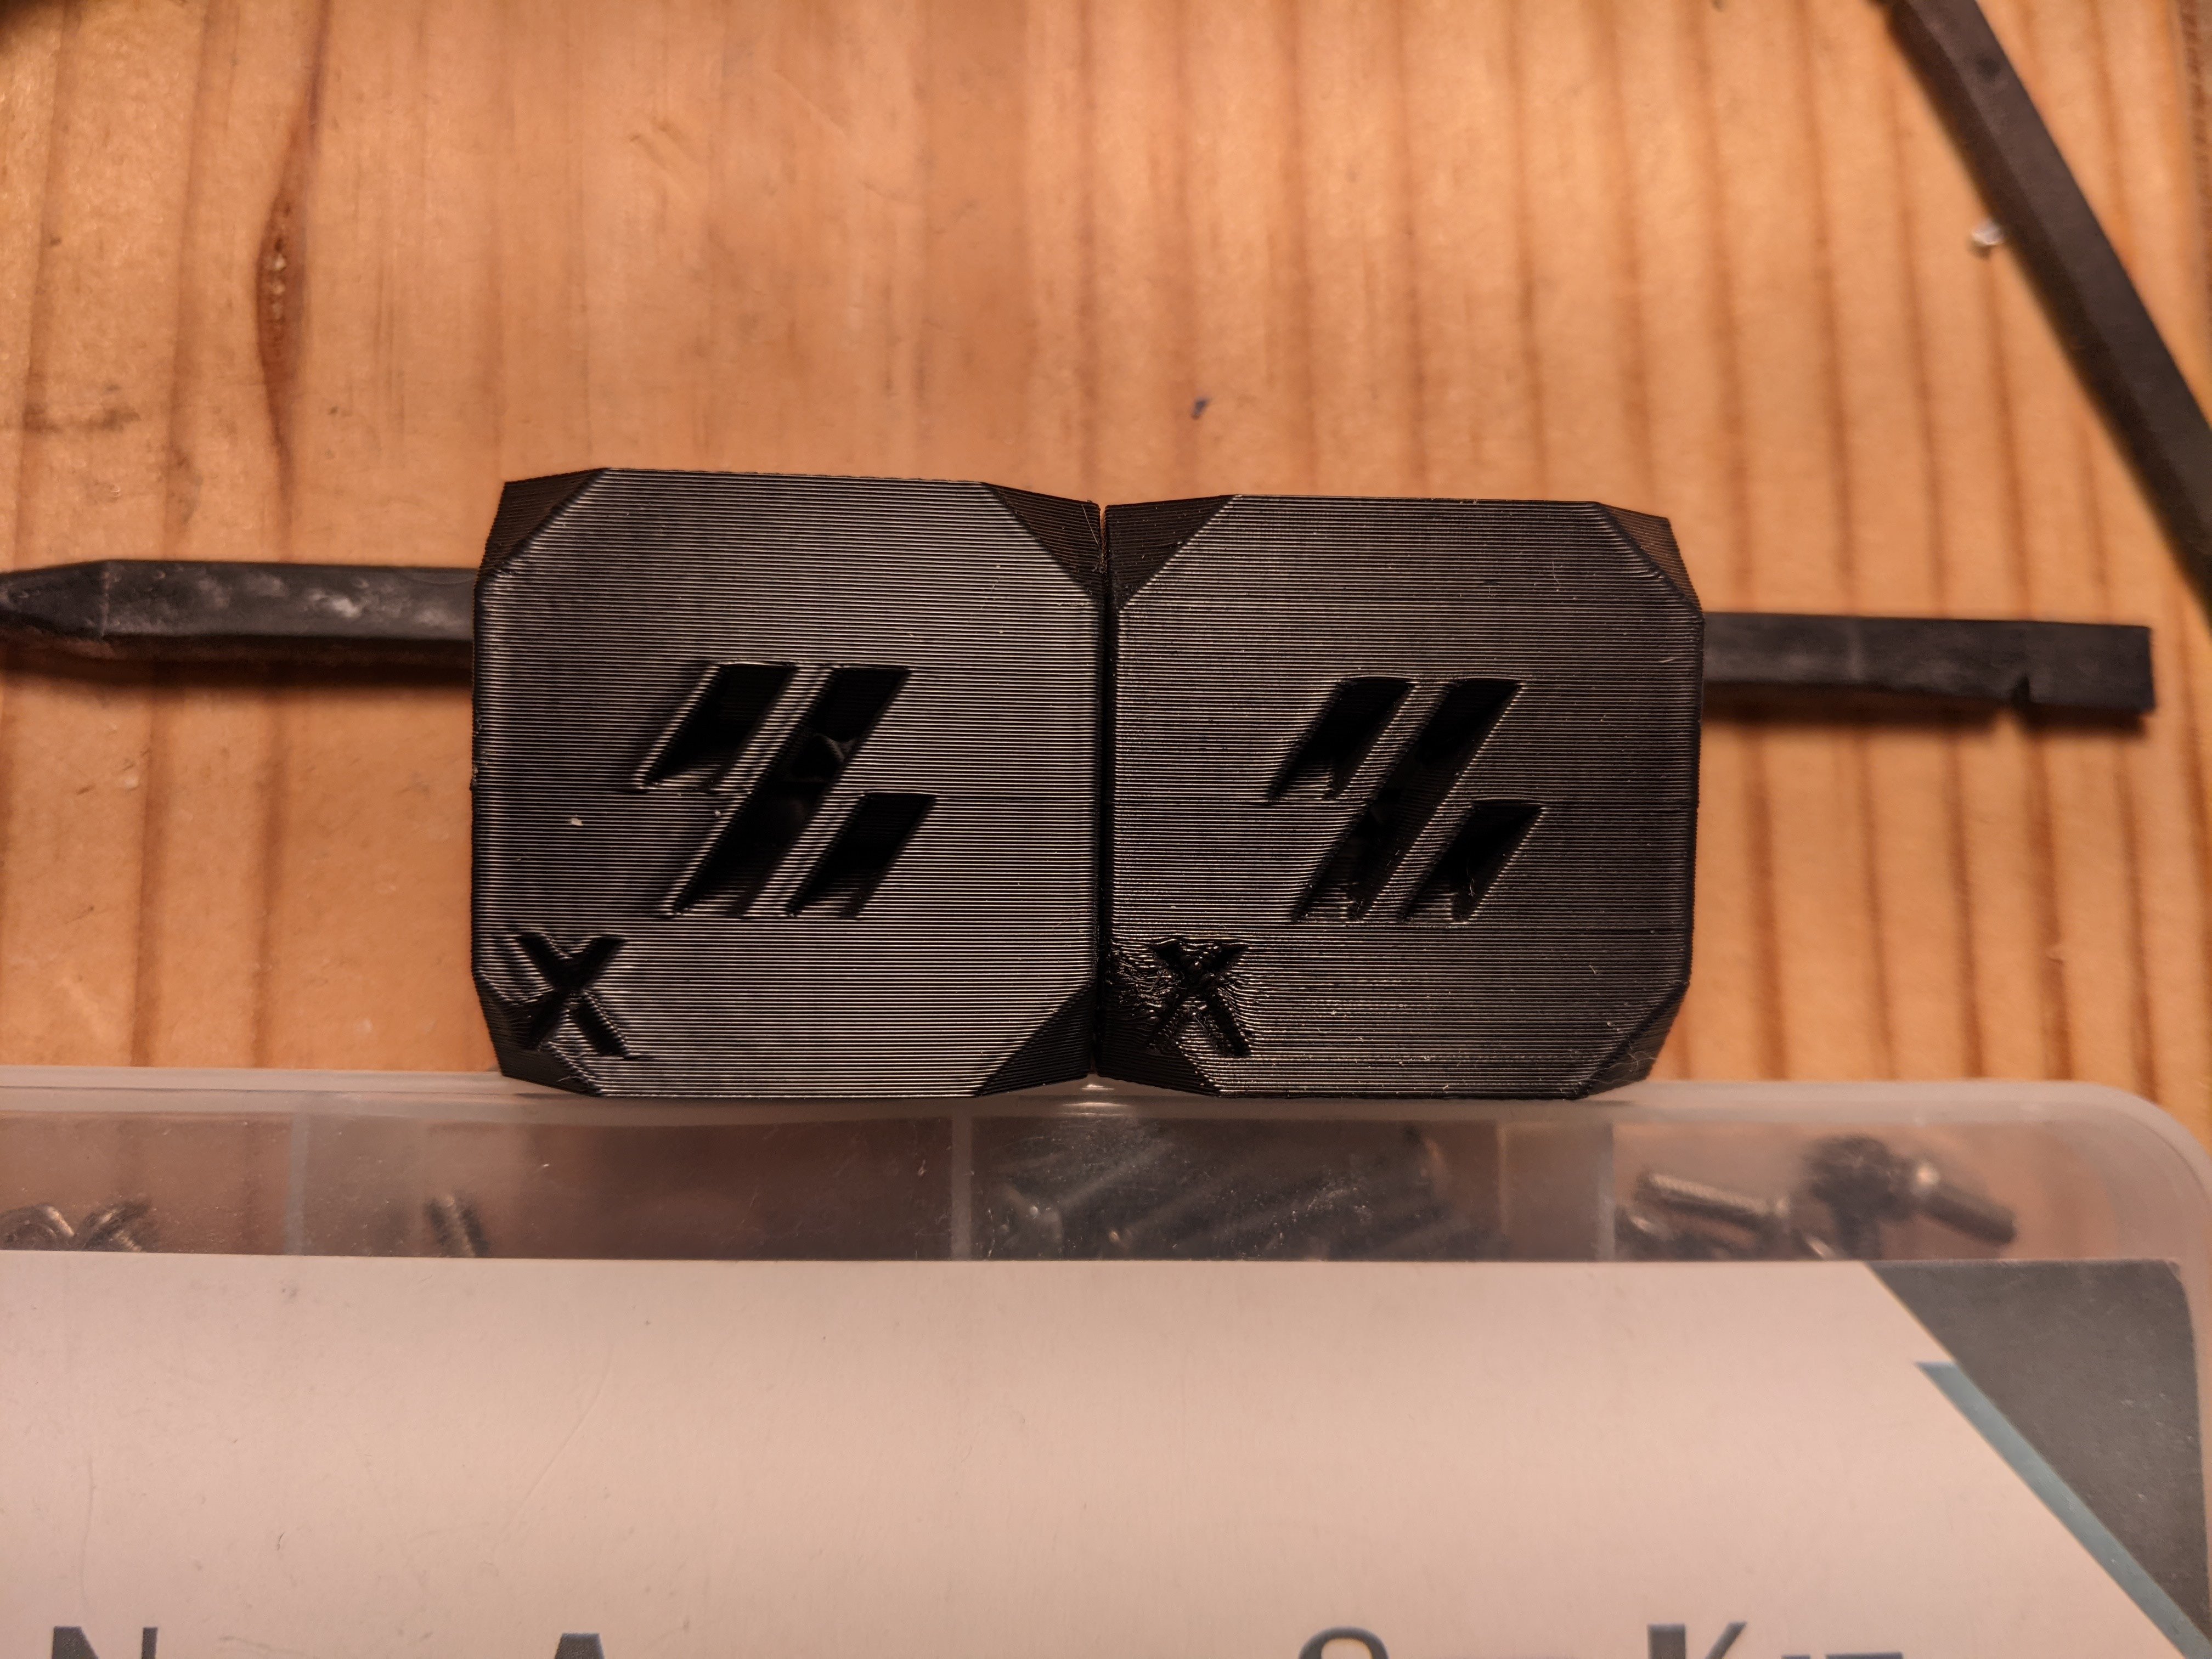
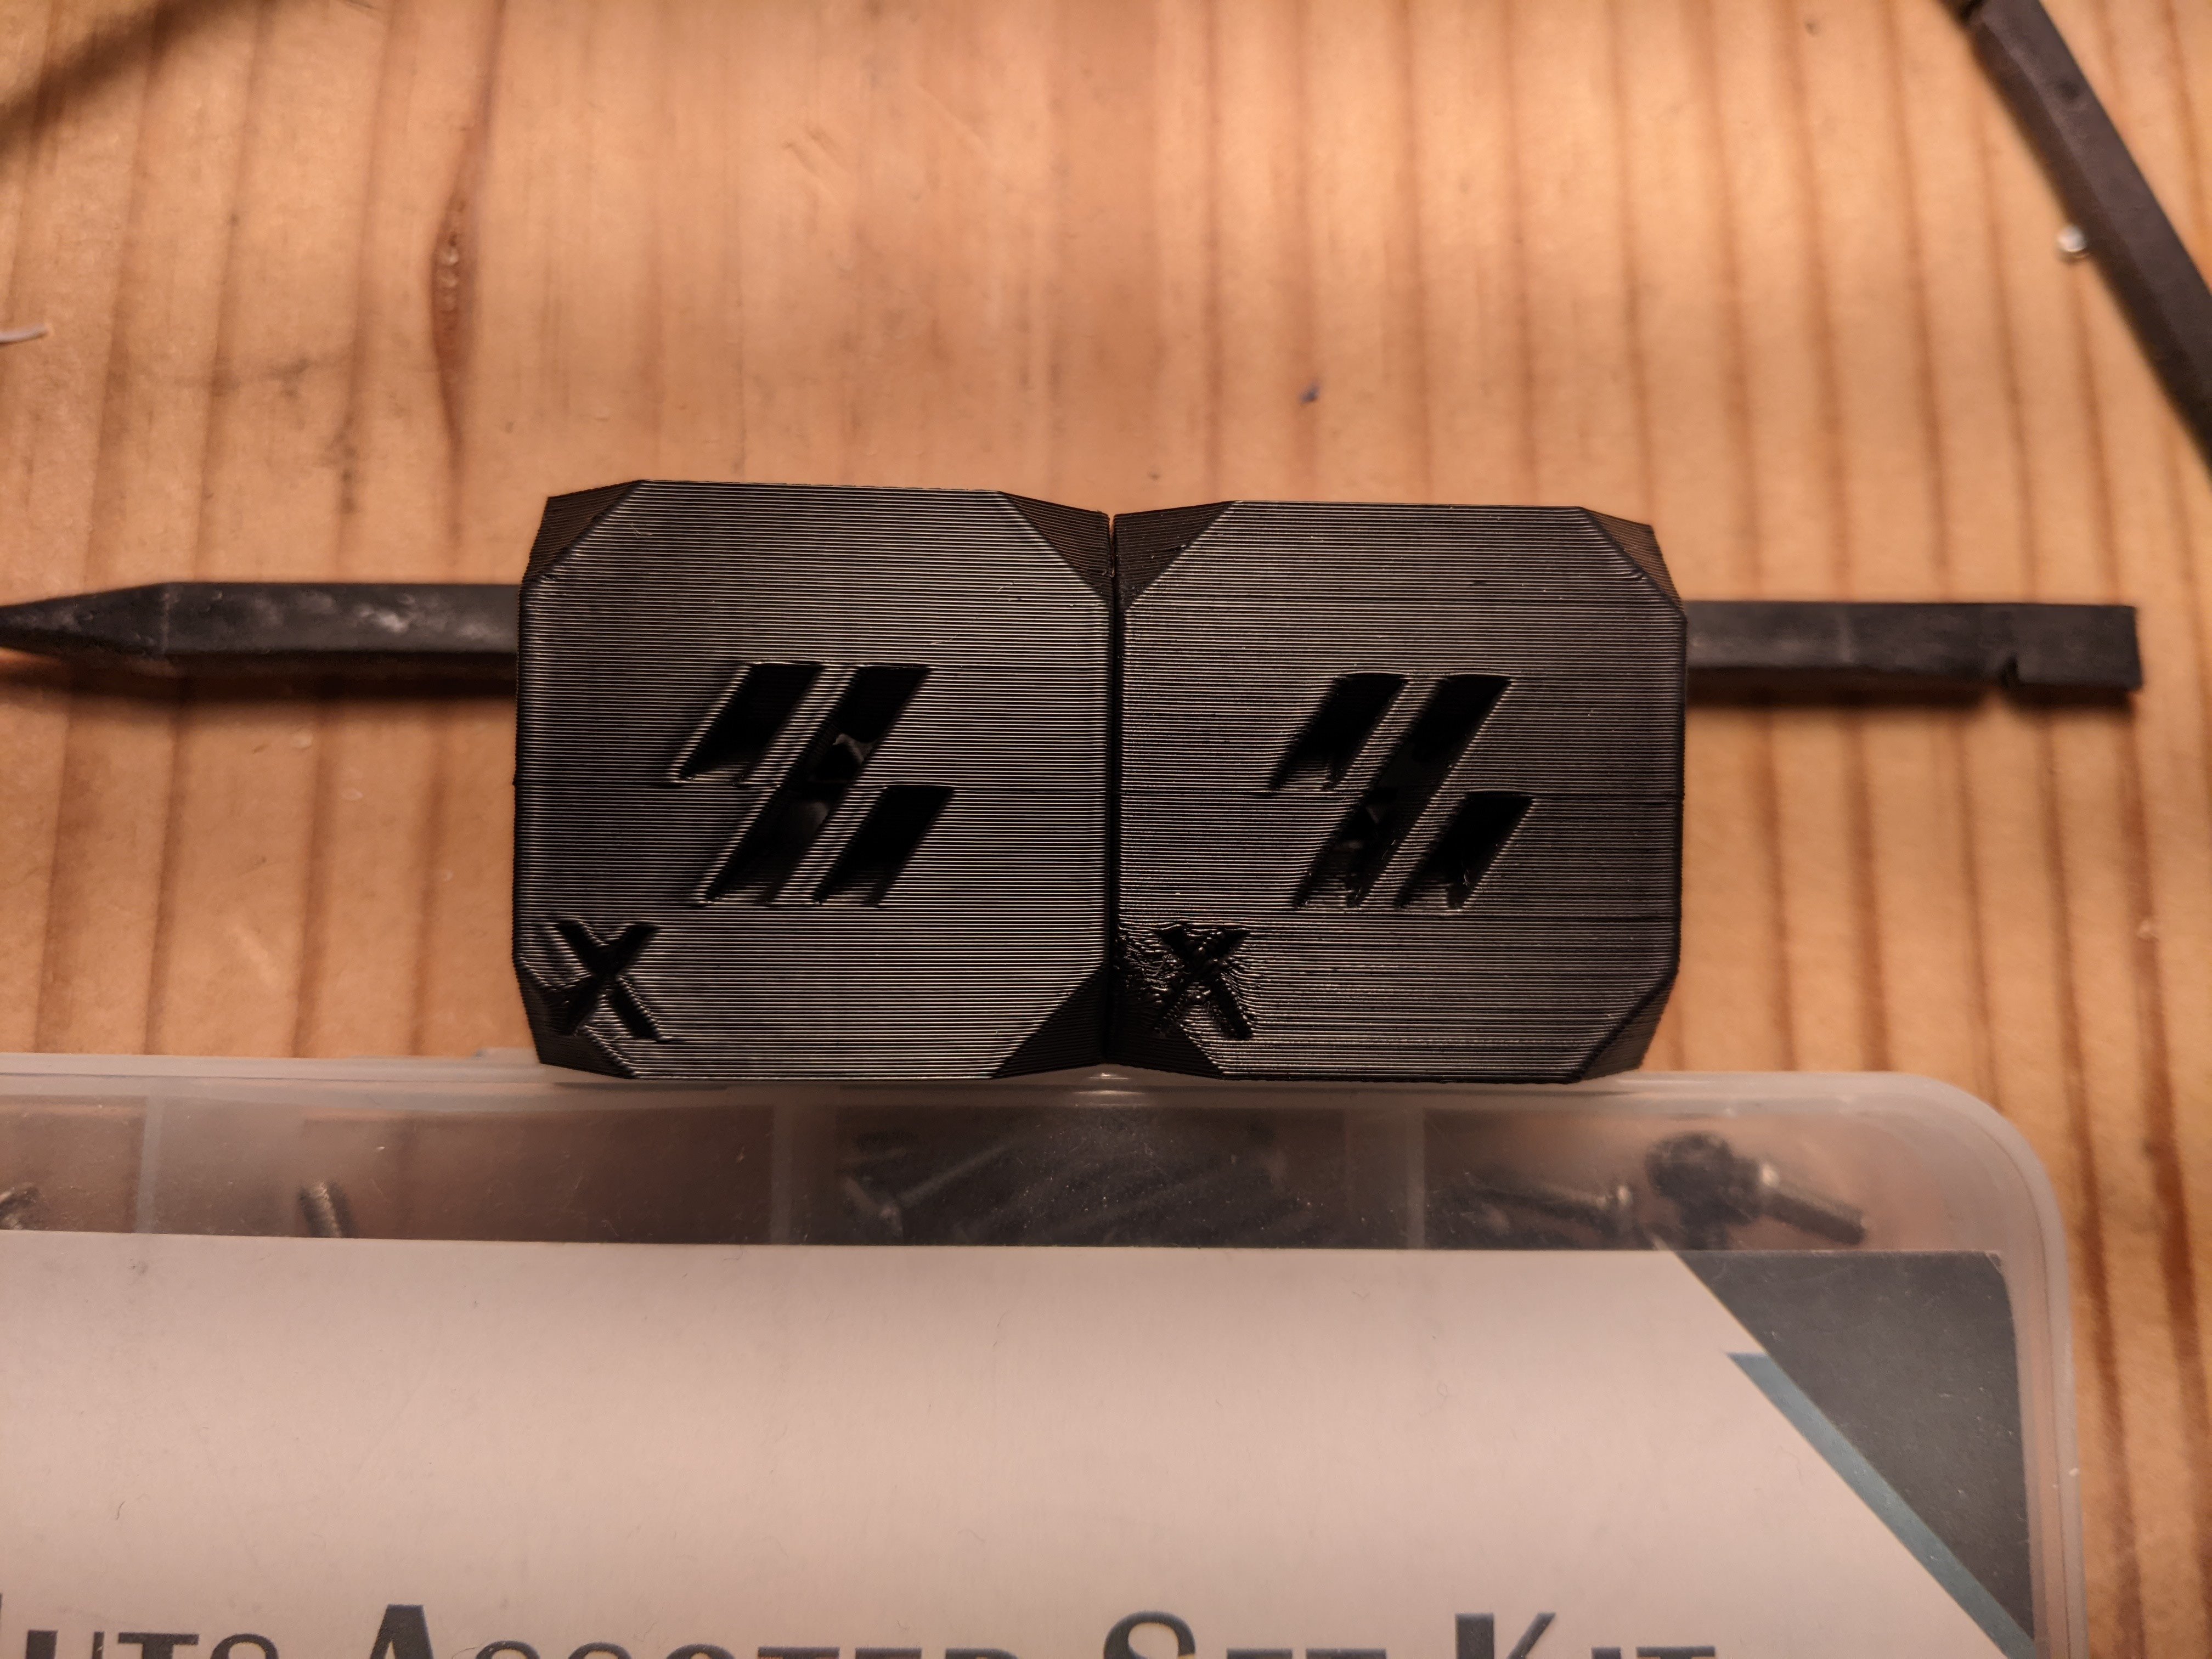
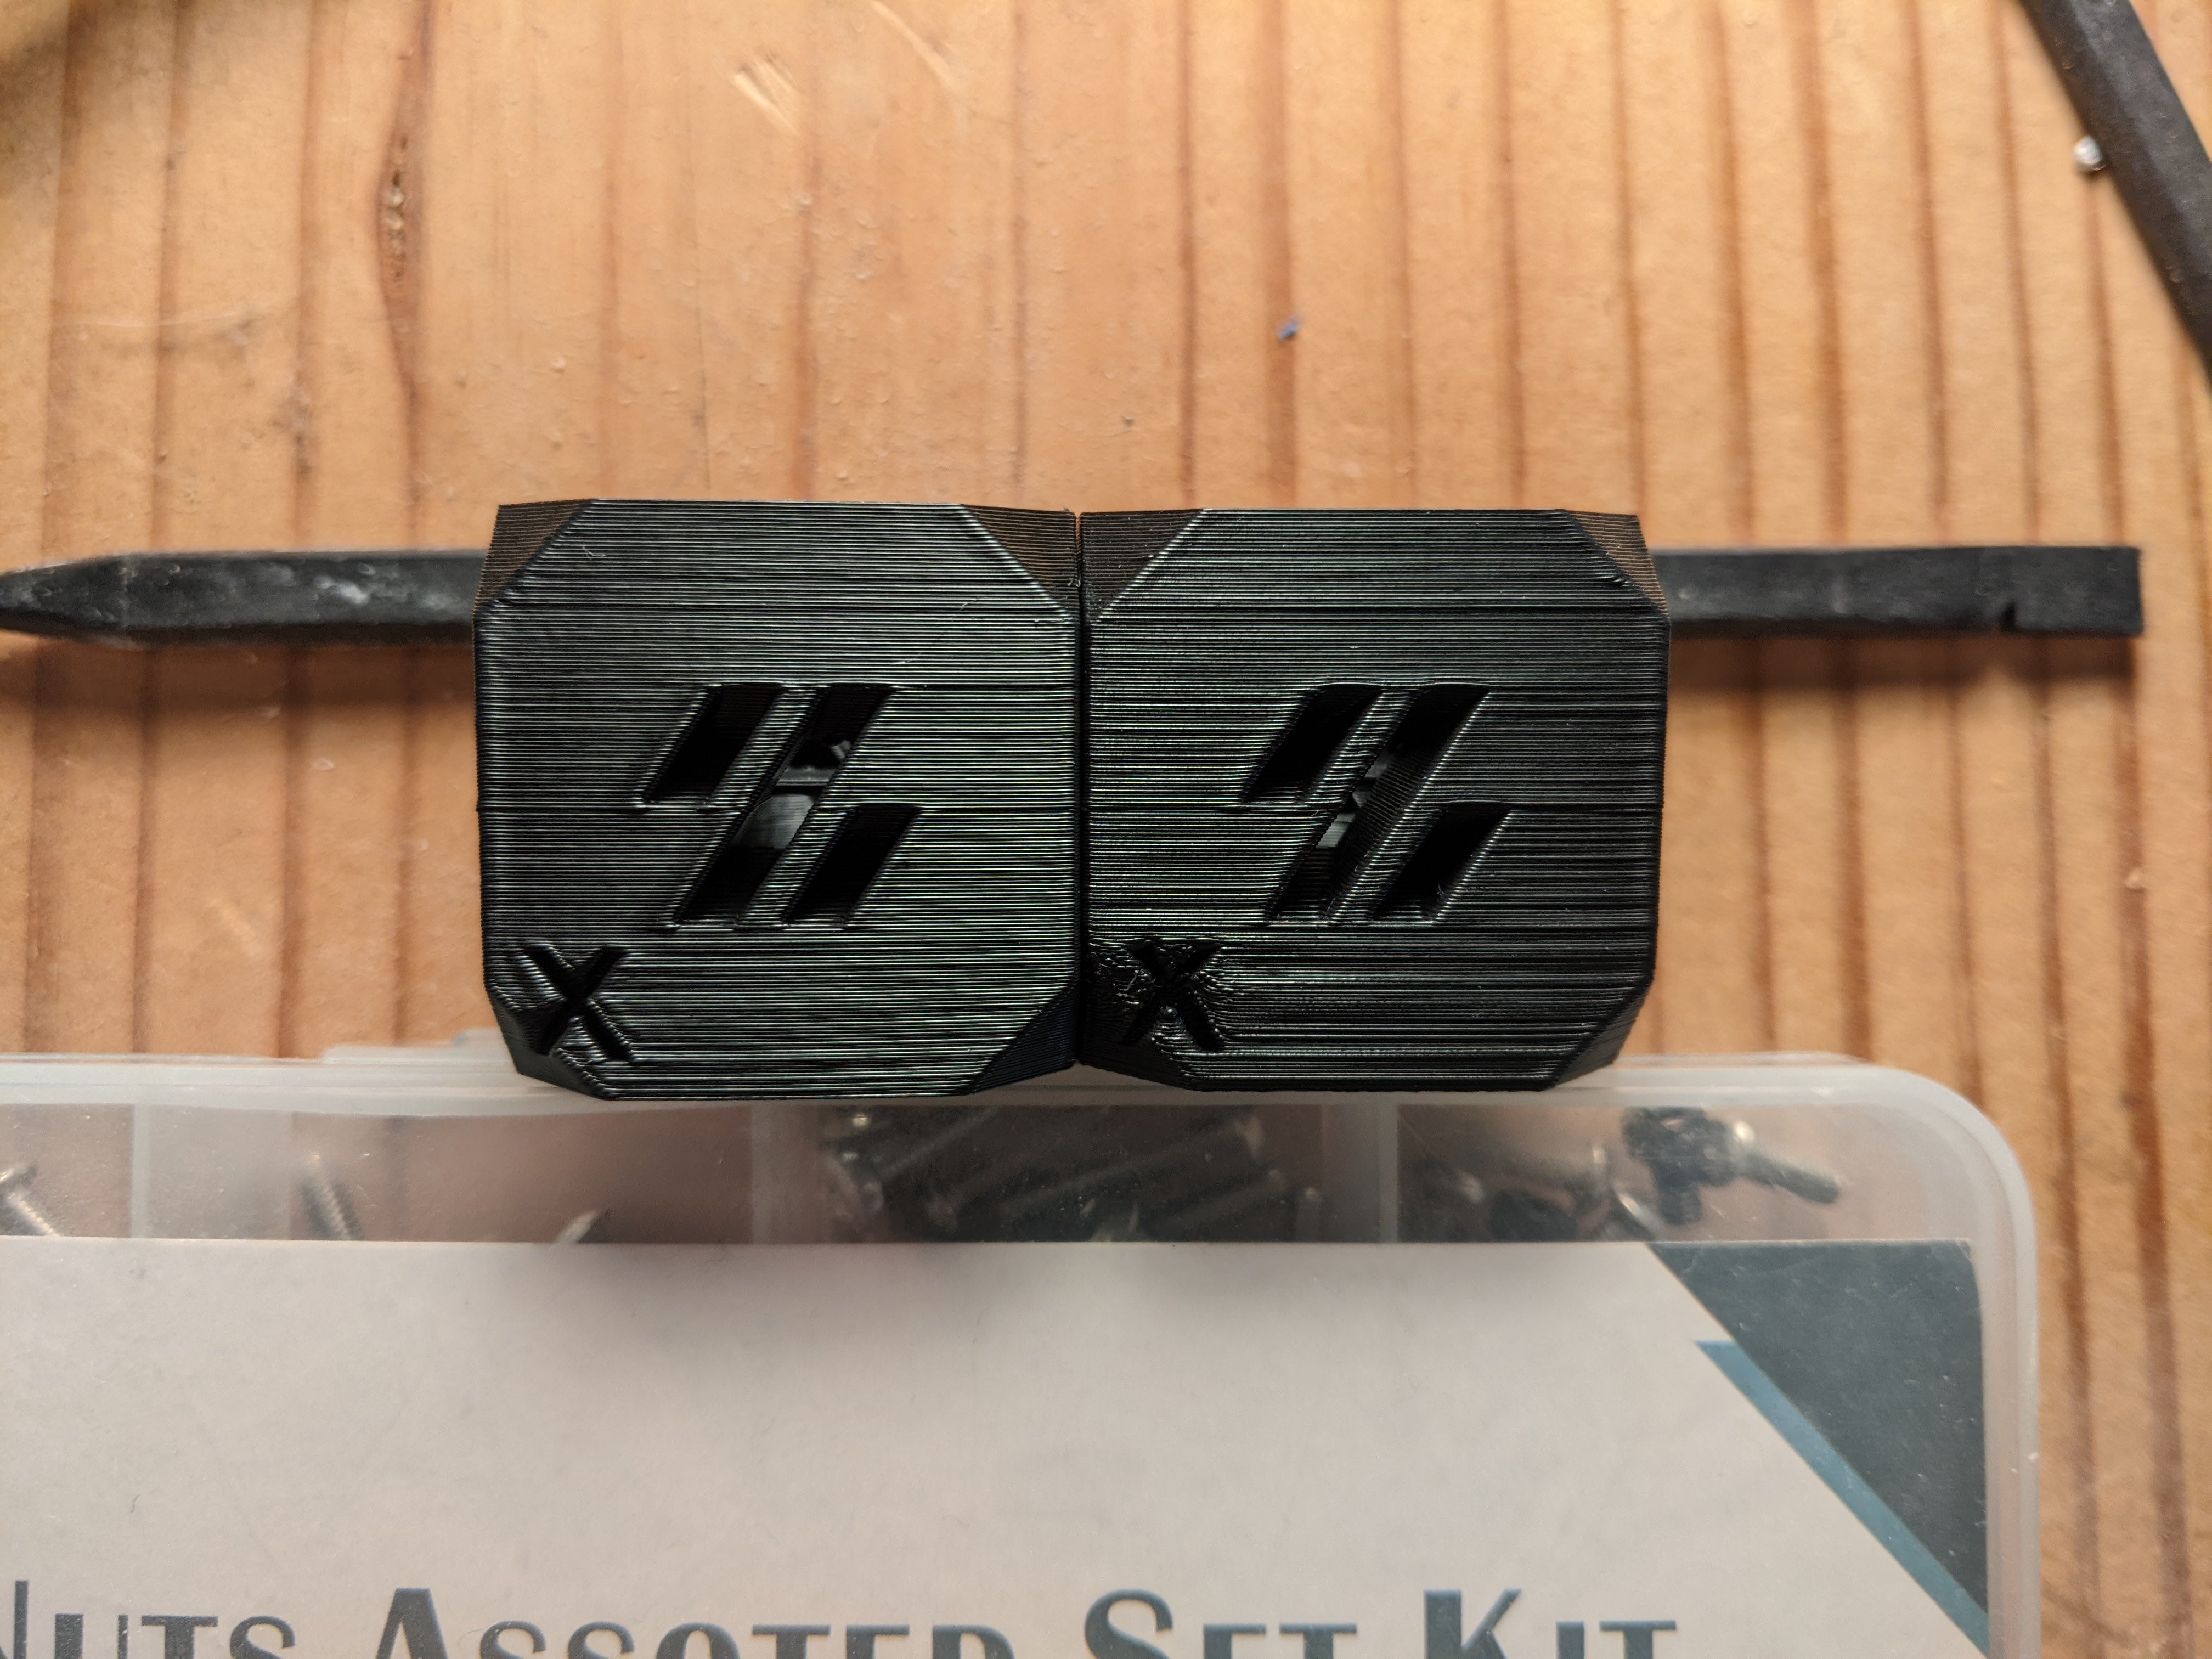
Here’s a series of photos using a Pixar style desk light at a few angles. The light is fairly direct/harsh. New part on the left, old part on the right.
90 degree to the cube’s face and fairly close. Pardon the spec of lint on the left cube :(
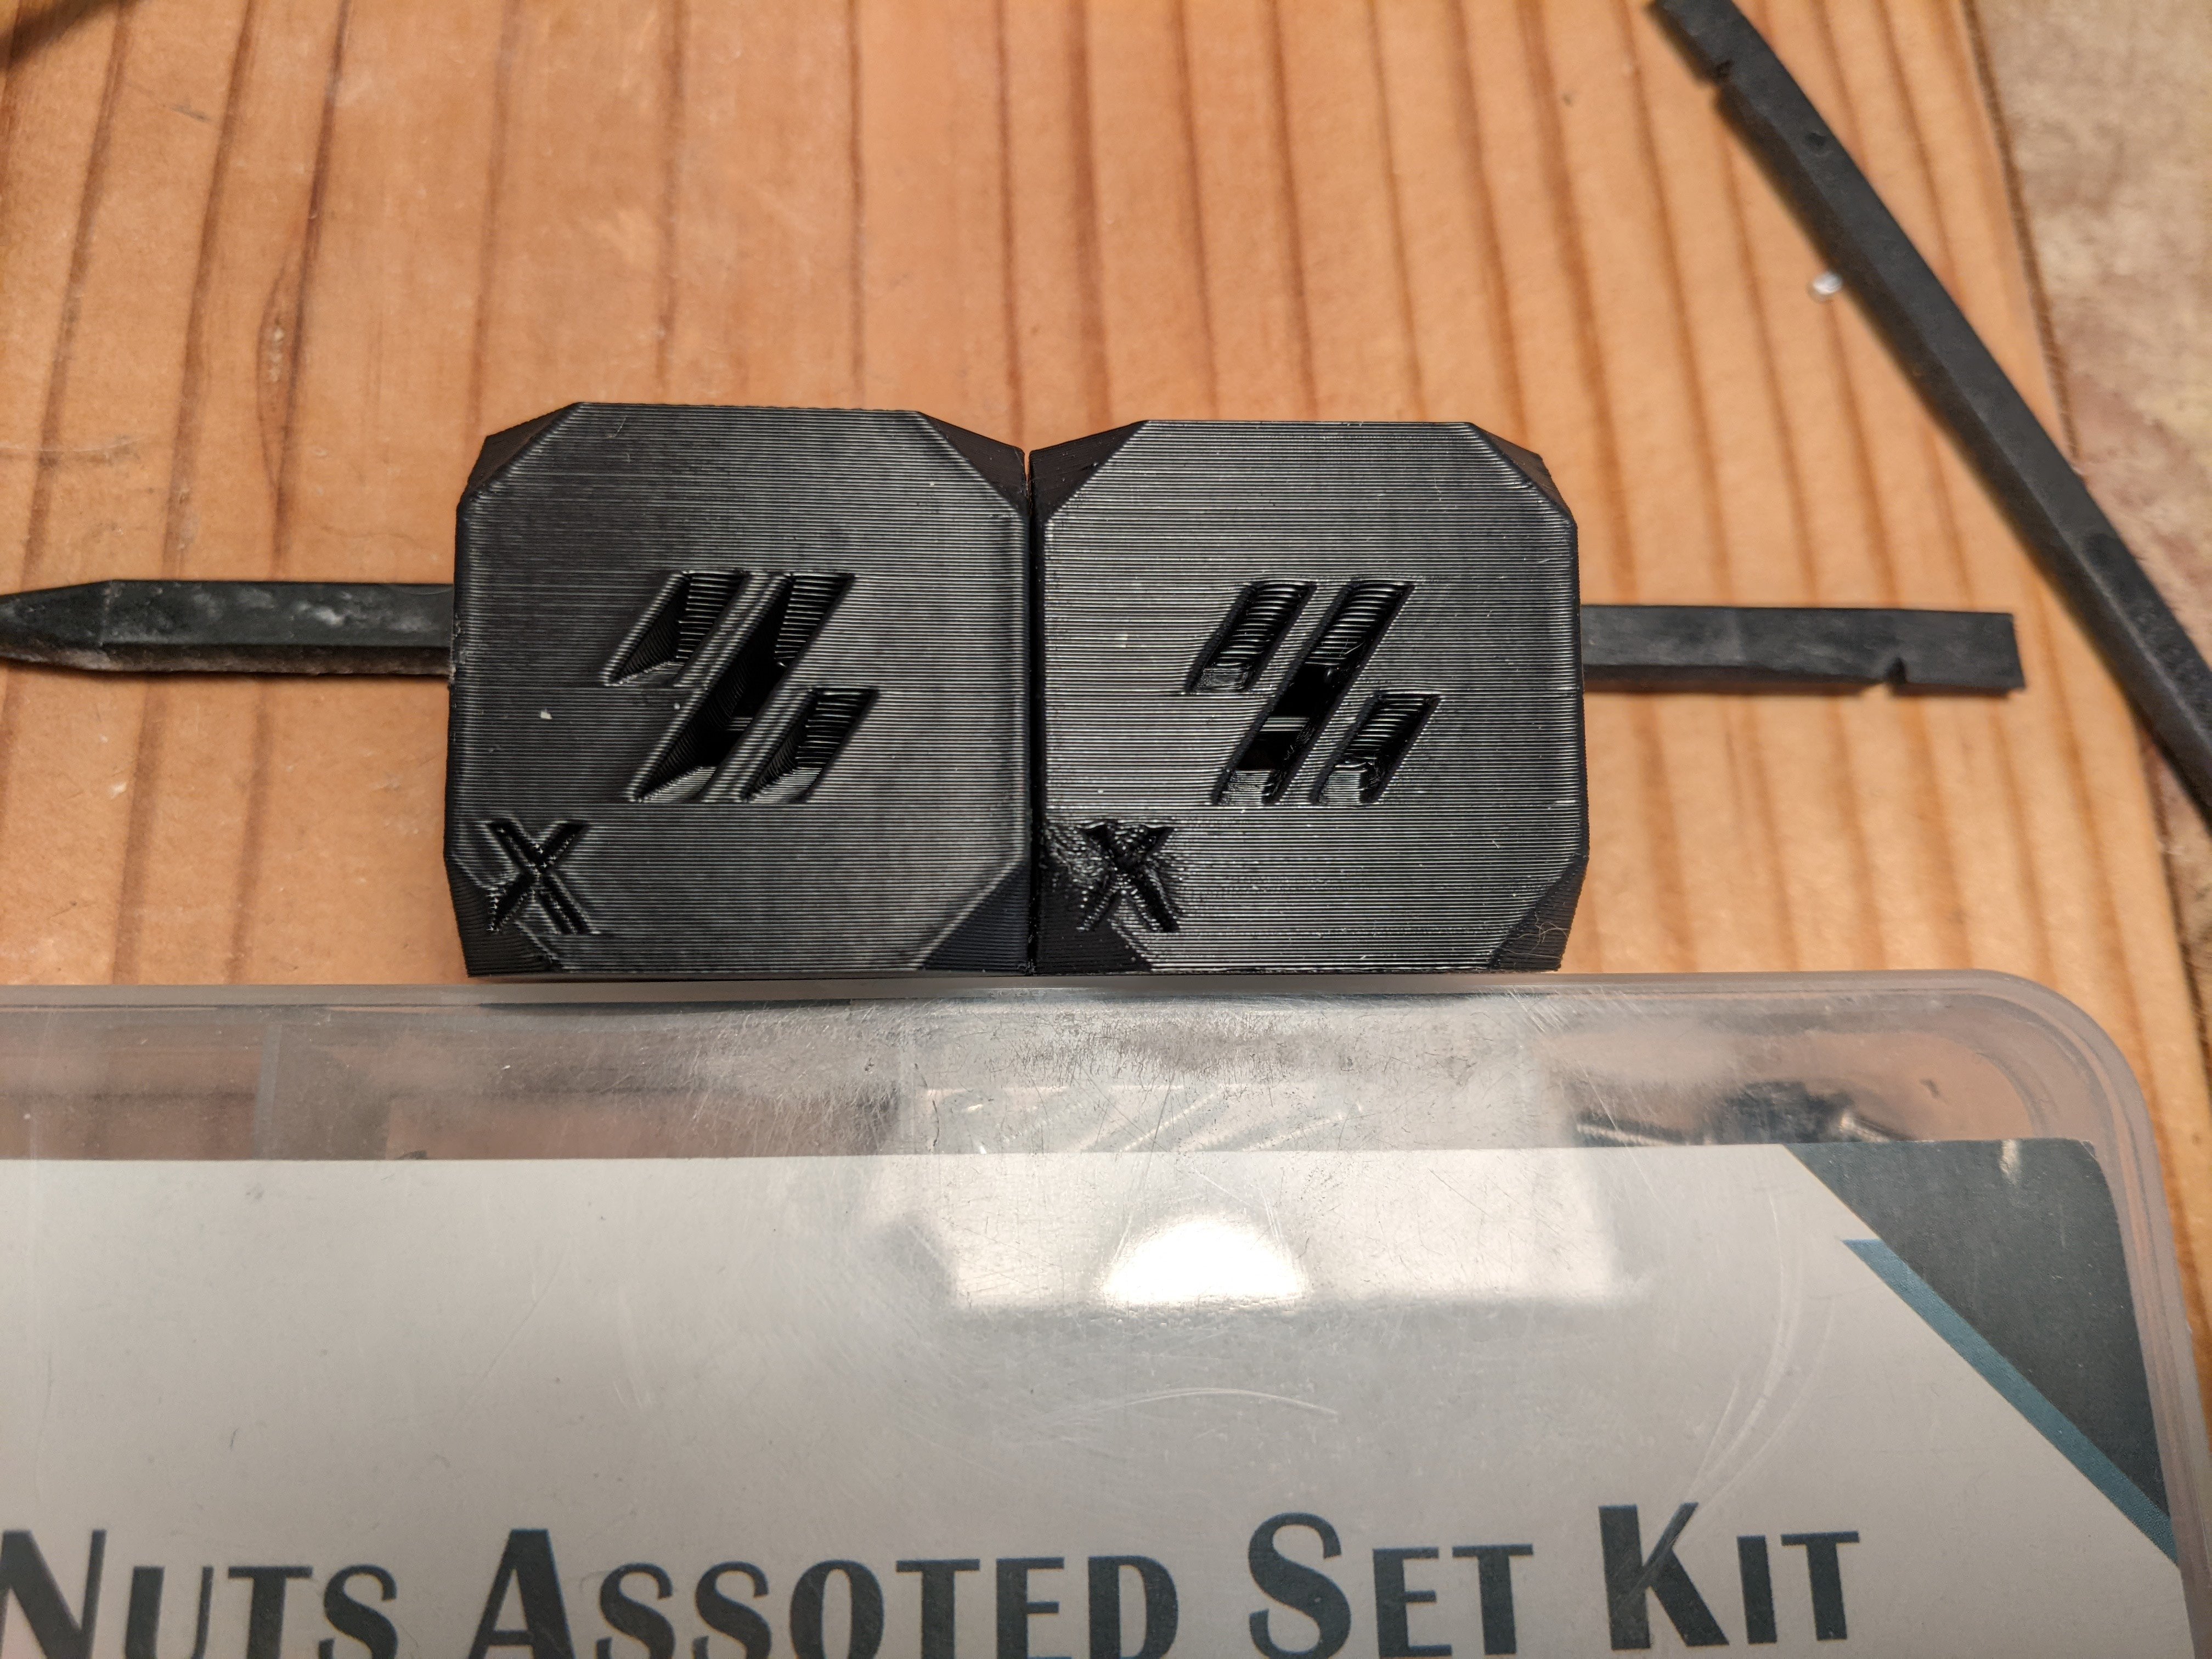
Shallow angle:
Getting steeper:
Here’s the light nearly perpendicular to the face of the cubes:
While disassembling, I noticed that one of the bolts attaching the carriage to the linear rail was… very very lose (backed out 3+ turns). Maybe that was another contributor to my inconsistent homing.
Oh yeah, it’s worth re tightening fasteners after a some operation time (10s after initial assembly, check as regular maintenance), I found the rail on my tap probe was slightly loose when I did a rebuild, was definitely contributing to some error.
Really nice results!
Another good one that I recently learned: clean your panels if you’re printing ASA/ABS. My printer was getting more and more stinky. Panel cleaning helped quite a bit. Other than a wire break, this is the first maintenance thing I’ve done. The printer has 618 hours on it so far. I am tempted to get obsessive in my quest for improving z-axis quality. I should also probably get around to doing input shaper tuning and check belt tension…
That’d explain a lot, I do primarily abs on my 2.4 so definitely going to do that, I installed a nevermore Max which has helped a lot as well. My maintenance has been kinda self inflicted because I can’t leave things be, I had bimetal cht nozzles shear off while doing a nozzle change, twice. First time I grabbed a 1.5 Nm preset wrench as my wrench only went down to 2 ish as the prusa docs called for 2.5 Nm, sheared again on the other printer, only found out now they recommend something like 0.5-0.8 Nm so I’ve gone back to coated hardened steel on both. I’ve been playing with larger nozzle sizes lately, 0.6 works pretty well but 0.8 just flies, I should print some tolerance tests once I get the cooling tuned but the few benchies I printed as a quick test looked decent enough.

