

- cross-posted to:
- welding@lemmy.ca
- cross-posted to:
- welding@lemmy.ca
Continued from Part 1.

Once we were happy with the setup Lulu started welding. Here she’s welding the cross bars into place.

We’ve taken a bit of a leap forward at this point. The floor of the fire box is welded in, we’ve installed the back of the fire box, and the cross bars for the rear baffle are welded into place.
In the next version of this evaporator I plan to bring an air feed in under the baffle at the back so that I can push air in under the first grate. This rear wall of the fire box is solid.

In this photo we’ve added the framing for the fire bricks on the back wall of the fire box and are test fitting couple of fire bricks, one at each end.

We used a big piece of cardboard to make a template for the left half of the rear baffle. The oil tank has lots of indents and curves to work around.

We traced the cardboard template onto a piece of steel sheet and cut it out. The fit wasn’t bad but there was going to be some gap filling to do.
I think that in retrospect I would have used treaded rod and a turnbuckle to close some of this gap for welding. I’ll do that next time and take pictures.

We made the sides of the baffles out of multiple pieces of sheet because that’s what we could cut out of the other tank. We used the same process here, drilling holes so that we could weld the sheet to the cross bars.

There was lots of welding and lots of grinding to do to get the rear baffle installed but we got it done.

These two cross bars behind the top frame cross bar we saw earlier will support the chimney connector. Note the circular cutouts for the chimney ring.

The hole in the rear deck lines up with the circular cutouts in the cross bars.

The chimney ring sits above the hole on the rear deck and we welded everything together.

We careful when you’re using zip cut disks. They have no respect for work gloves or fingers.

I spent too much time producing this paper template for the point where the leg meets the tank. We wrapped the paper around the tube, clamped the tube in place, then scribed the connection with a block of wood and a Sharpie. I then spent time working with scissors to improve the fit.
Next time I do this I will build the jig that you see in the next photo and scribe the connection with the leg clamped in the jig.

This large rectangular jig sits on the tank and holds the legs in place for welding. We were able to tap the jig to adjust it to make sure that it was level in relation to the tank and that the legs were therefore plumb.

We marked the tank and did some weld prep.

Next, we tacked the legs and the long axis gussets. The legs on the old evaporator were flimsy. These ones would not be.
We then removed the jig, used carboard to design and cut the short axis gussets, tacked them in place, and welded the leg and gussets.

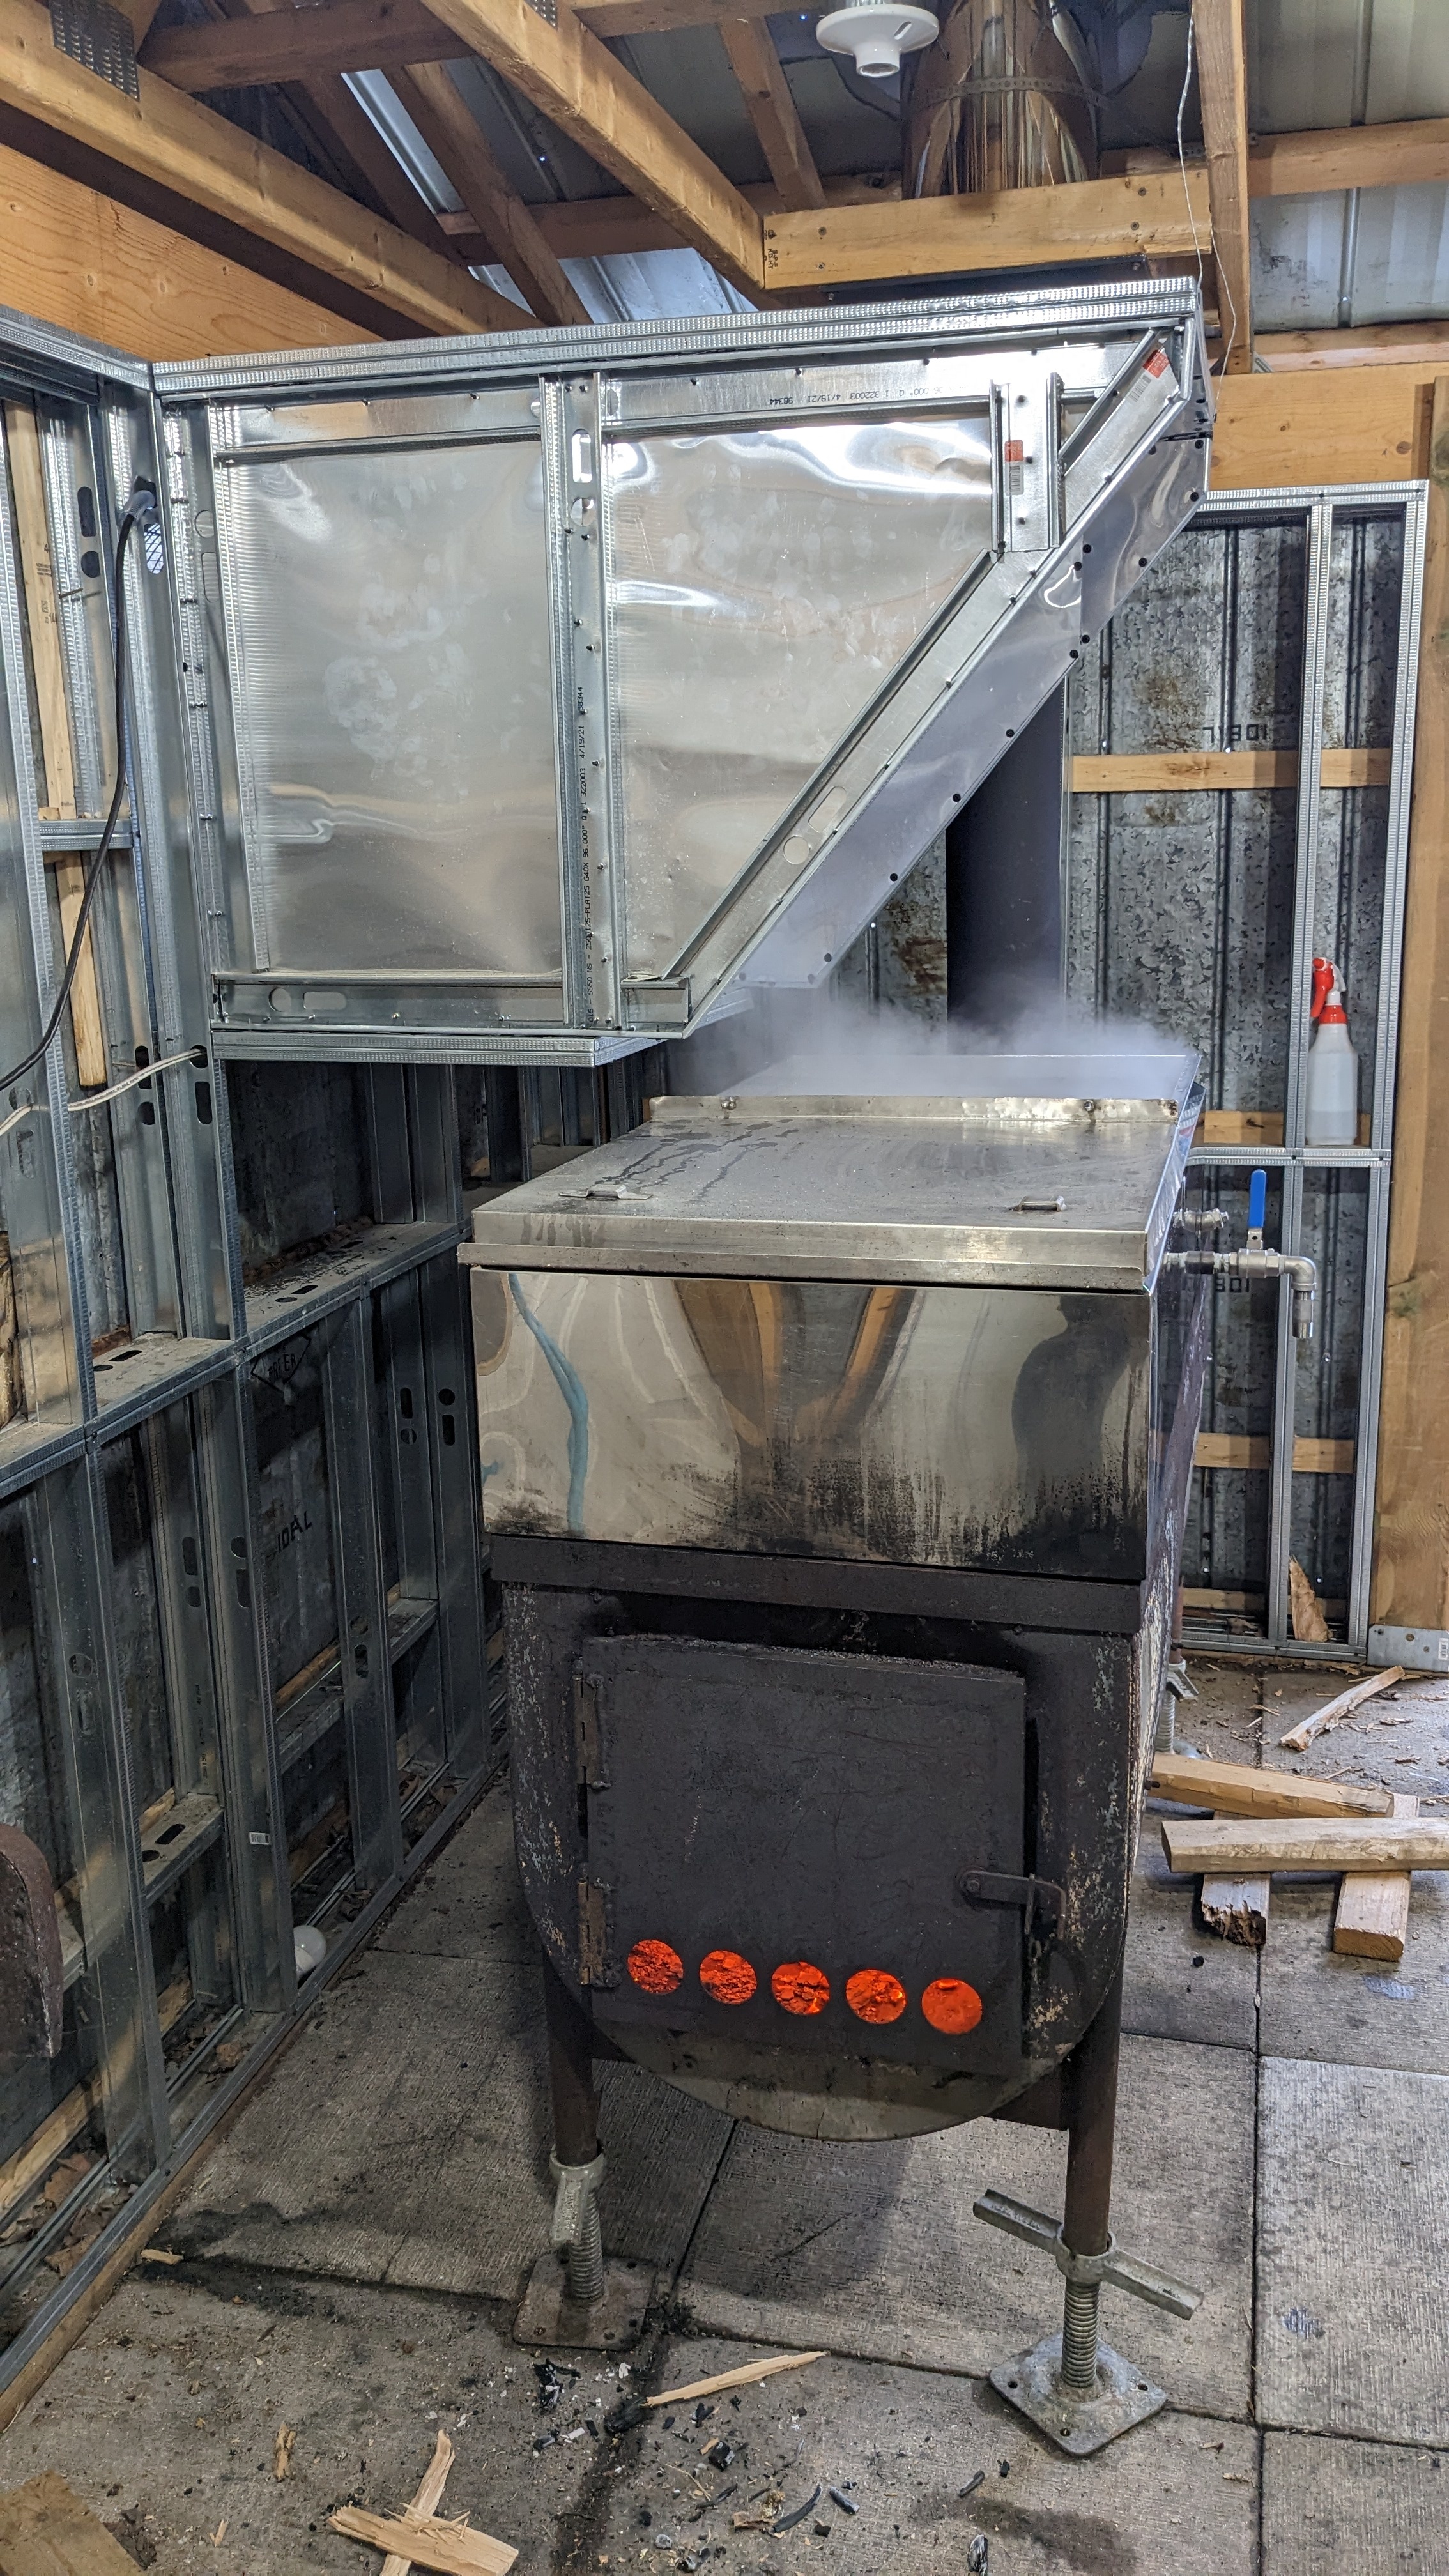
Now we could finally get it up on its feet. This is, I believe, the greatest improvement over the old evaporator. Using the screw type scaffold jack feet allows me to level the evaporator on uneven ground or an uneven floor. Even in my new sugar shack the ground moves a bit in the spring. Being able to kick the handles and bring it back into level easily is amazing. I had to shorten the legs a bit but that was easily done with a cutting disk on the grinder as they were hollow. Solid ones would be harder to cut but the hollow ones work fine for this application.
You can see in this photo that we have started to tack together the fire grate. It’s made of 1 1/2" x 1/4" bar and 2" x 2" x 1/4" angle.

A closer look at the tacked grate.
In the next version I will weld bar onto the open side of the angle to add additional strength. With differential heading from the fire the grate warped.

The door is a frame of 1" x 1/2" steel channel with a field of steel sheet. The hinges are trimmed down and welded to the door frame and the frame of the door.

I glued wood stove gasket into the channel frame on the door to keep the smoke in. The chimney drafts enough air that smoke doesn’t home out the vent holes.

We built the door handle and closure out of some scraps of steel that I had in my scrap bucket.
This was a great build and Lulu and I had a lot of fun. There are LOTS more photos that I didn’t include here. If you’re interested in any specific aspect of this build or have any questions please feel free to ask or comment.
You must log in or register to comment.